Getting Started
Installation
NPM : You must have to install requirement packages.
In the project directory, you can run: npm install to install all the necessary dependencies.
These scripts refer to the different stages of developing an application:
dev- Runsnext devwhich starts Next.js in development modelint- Runsnext lintwhich sets up Next.js' built-in ESLint configurationbuild- Runsnext buildwhich builds the application for production usagestart- Runsnext startwhich starts a Next.js production server
Development
After the installation is complete:
Run npm run dev for a development mode. Open http://localhost:3000 to view it in the browser.
The page will reload if you make edits. You will also see any lint errors in the console.
- Run
npm run devoryarn devto start the development server onhttp://localhost:3000 - Visit
http://localhost:3000to view your application - Edit
pages/index.jsand see the updated result in your browser
Deployment
If you haven’t already done so, push your Next.js app to a Git provider of your choice: GitHub, GitLab, or BitBucket. Your repository can be private or public.
Then, follow these steps:
- Sign up to Vercel (no credit card is required).
- After signing up, you’ll arrive on the “Import Project” page. Under “From Git Repository”, choose the Git provider you use and set up an integration. (Instructions: GitHub / GitLab / BitBucket).
- Once that’s set up, click “Import Project From …” and import your Next.js app. It auto-detects that your app is using Next.js and sets up the build configuration for you. No need to change anything — everything should work just fine!
- After importing, it’ll deploy your Next.js app and provide you with a deployment URL
- To get more help on the deployment checkout
Updates
You always be able to download the new update of this template for free from the themeforest.net -> Downloads section. Make sure to back up your live website before doing any updates. You will be required to update any folders and files located in the template archive and especially make sure that \public folder is also updated.
Update using FTP:
- Download the latest version of the theme to your device.
- Connect to your hosting via FTP software
- Upload the theme folder you unzipped to your site folder
- You should be asked to confirm overwriting of this folder and its contents. Confirm the overwrite.
Structure

Folder Structure

Pages

Components

Customization
How to create a new page?
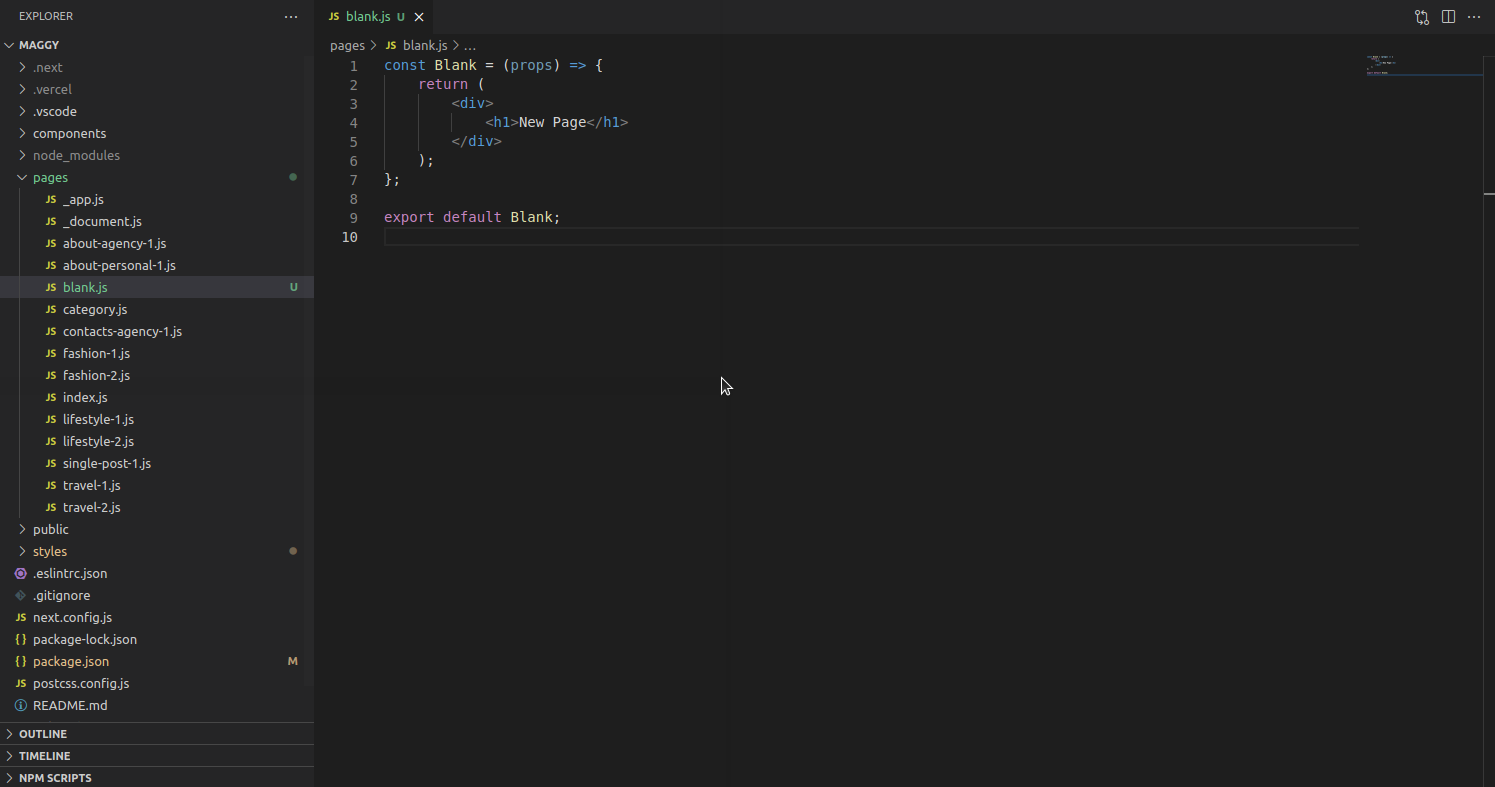
In Next.js, a page is a React Component exported from a .js, .jsx, .ts, or .tsx file in the pages directory. Each page is associated with a route based on its file name.
Example: If you create pages/about.js that exports a React component like below, it will be accessible at /about.
Create page: pages\blank.js

How to change Colors?
styles/01-settings/global.scss

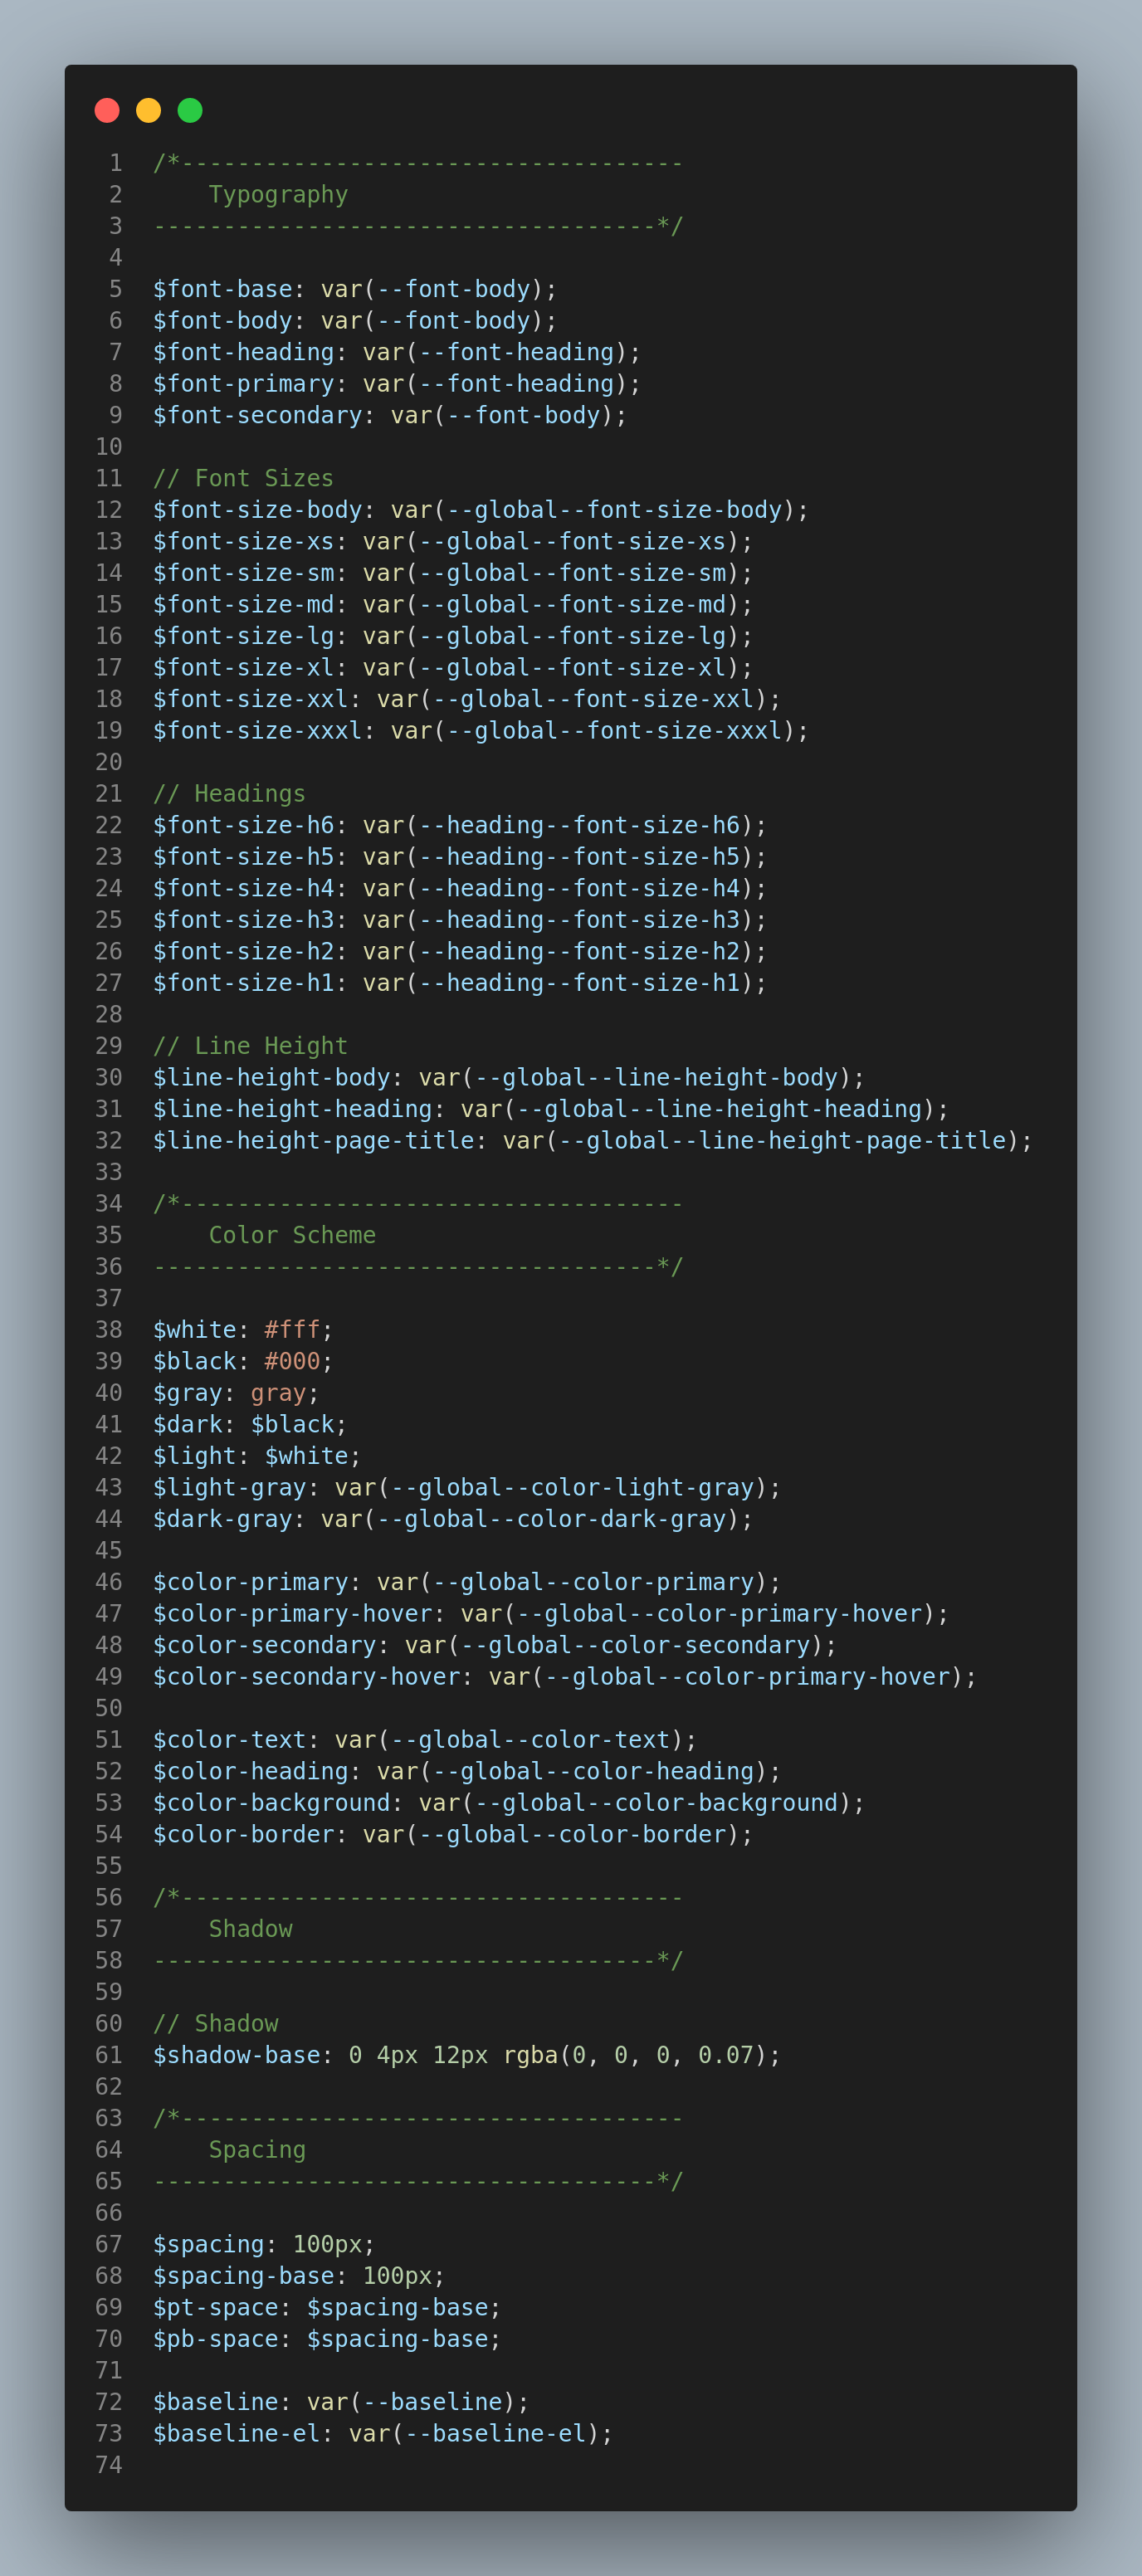
How to customize typography?
styles/01-settings/variables.scss

How does routing work?
Next.js has a file-system based router built on the concept of pages. When a file is added to the pages directory, it's automatically available as a route. The files inside the pages directory can be used to define most common pattern
Linking between pages:
The Next.js router allows you to do client-side route transitions between pages, similar to a single-page application. A React component called Link is provided to do this client-side route transition.
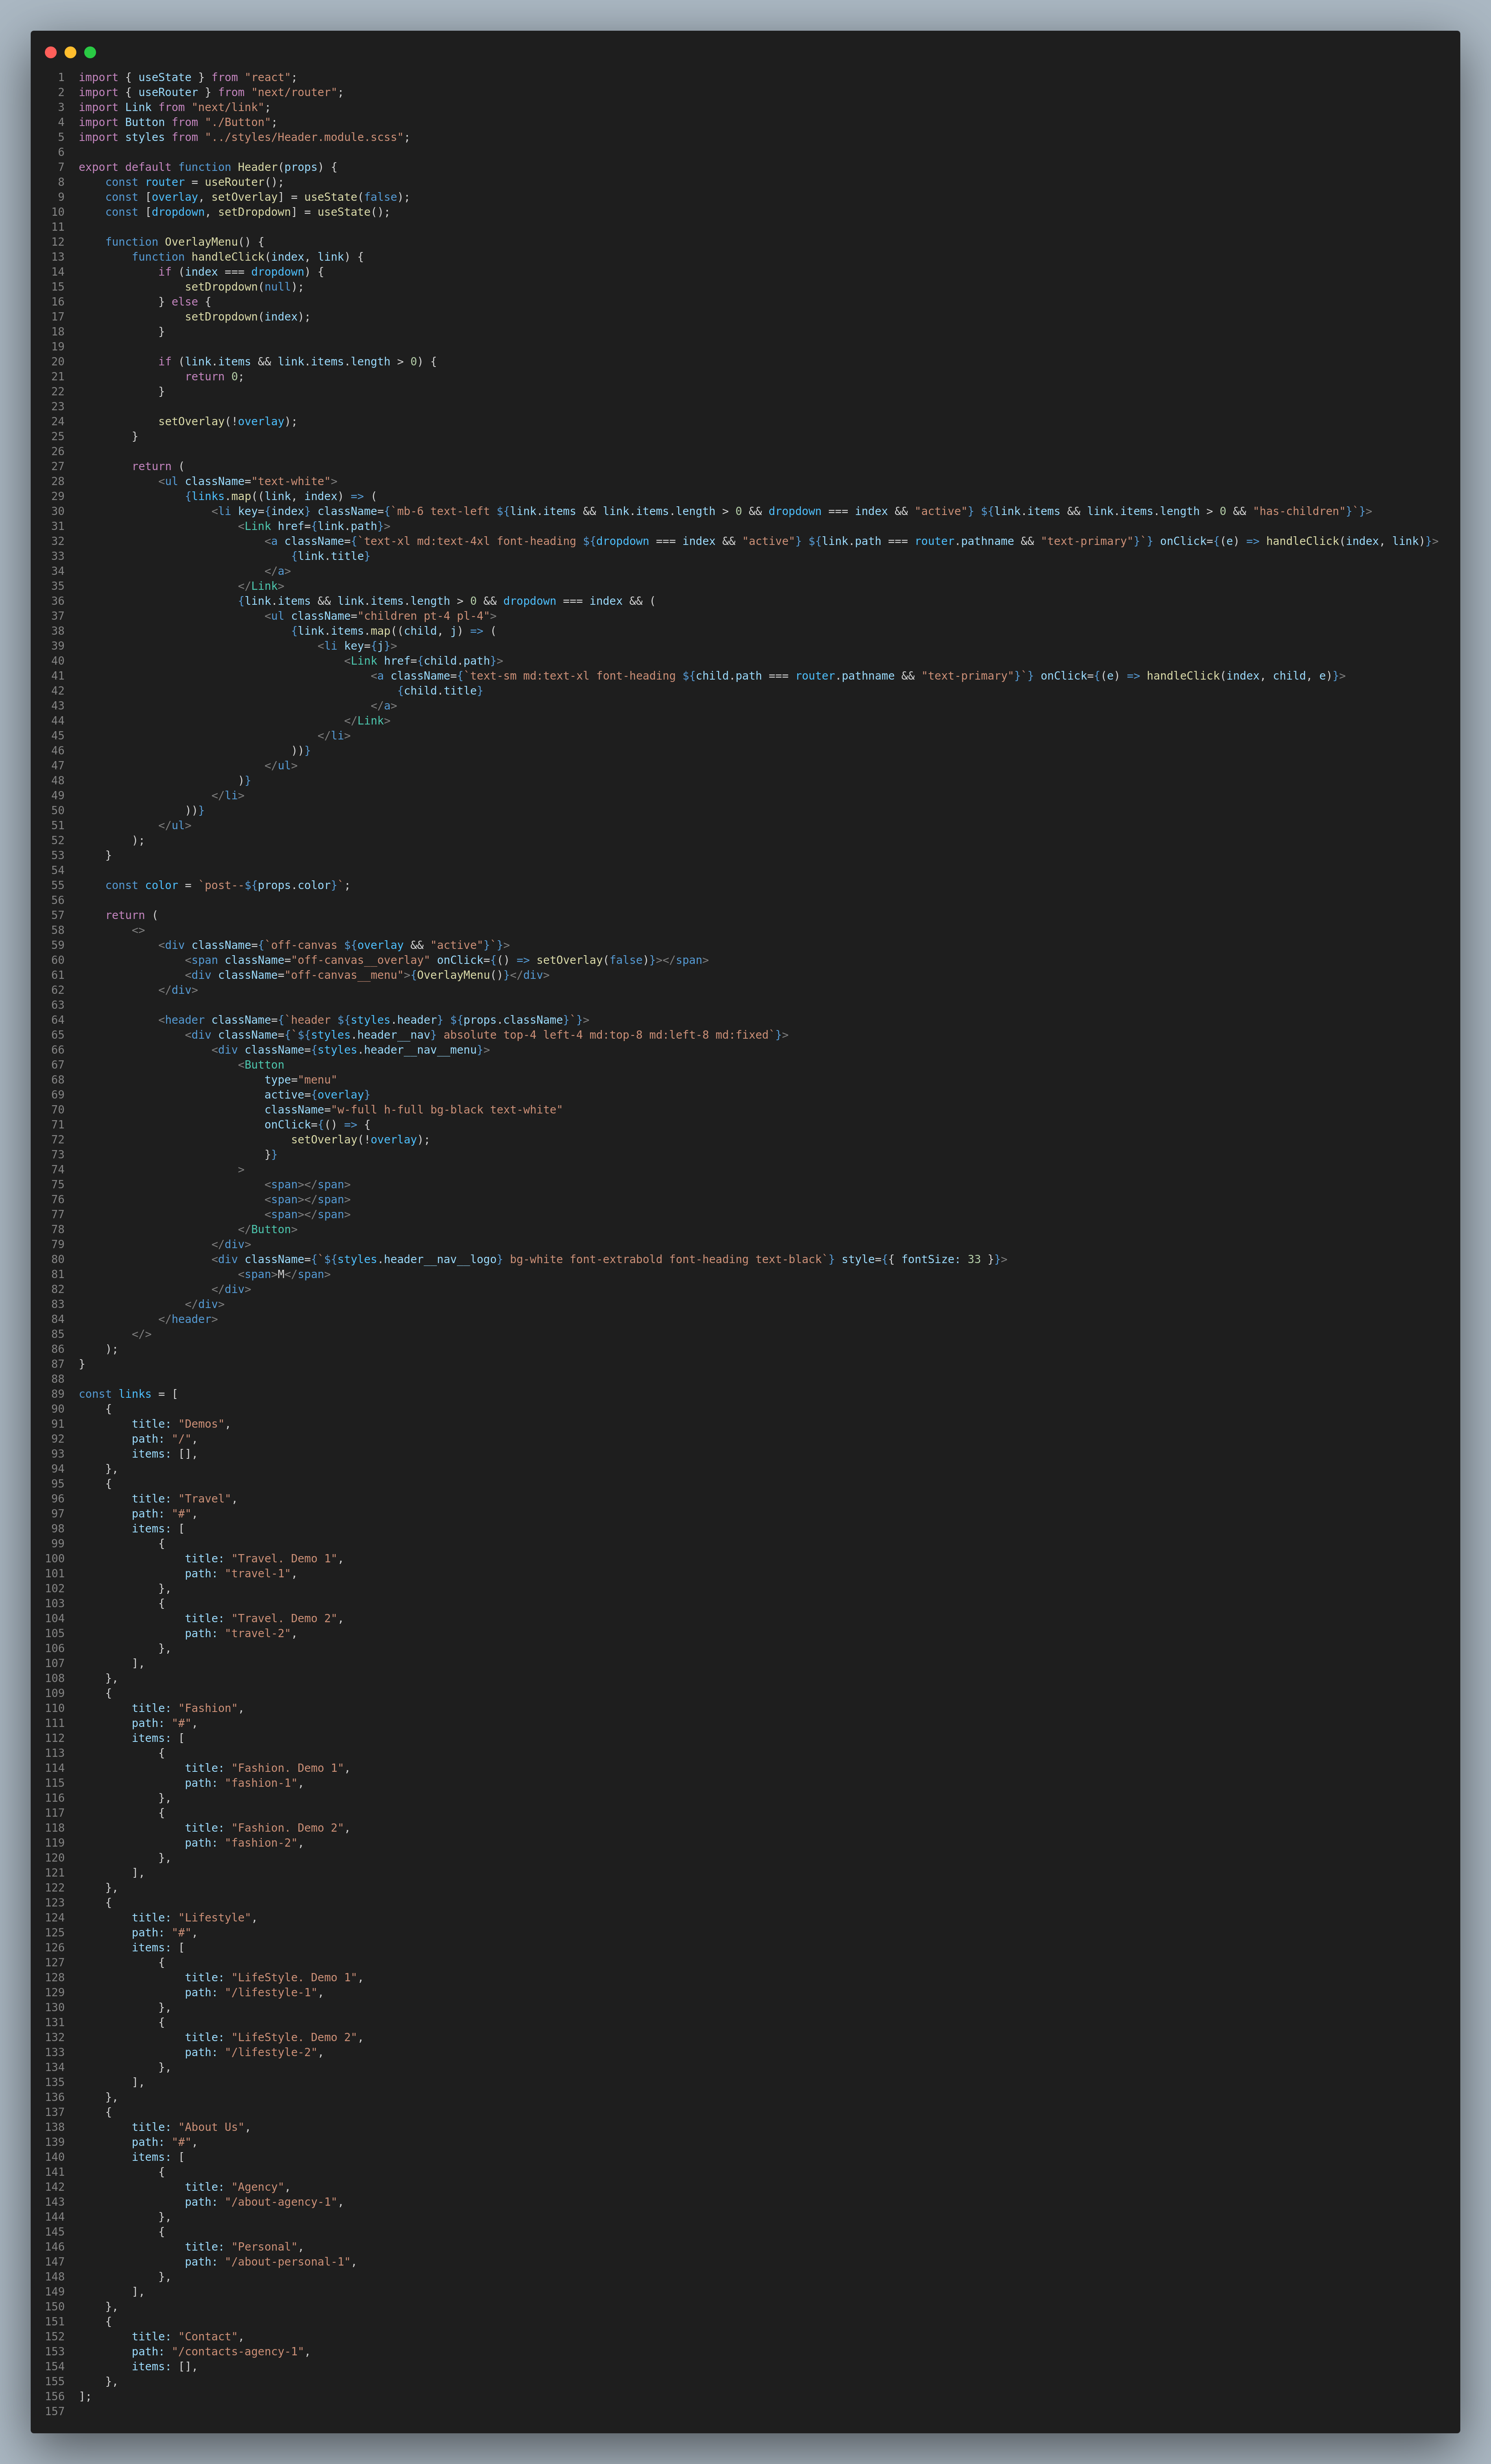
Edit components/Header.js

Credits
Thank You
Thank you so much for using this template.